I have finally updated the design of my working minifig ski hill and finished making instructions for it. If you are not familiar with this model, it is a fully operational ski hill that allows your minifigs to go endlessly skiing on their own.
You can see a demonstration of the model in the following video and read more about it below. Building instructions are available on Rebrickable, and a full building kit is available from BuildaMOC. If you build it, or are thinking of building it, be sure to read the build notes below to get the most out of it.
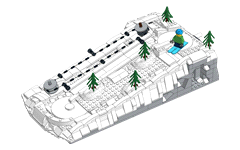
Model Overview
Conceptually, the model is relatively simple. The ski ‘lift’ consists of three of the strings with minifig grips connected together, each with a bar clipped onto them. These strings rotate around a pair of wheels, with the bars pushing the minifigs up the slope.
At the top of the hill, the minifigs are deposited onto a rotating turntable that turns them around and pushes them down the ski slope. Once they reach the bottom, they land on another turntable which brings them back to the base of the lift. From here, they simply wait for the next bar to push them back up the hill.
Up to three minifigs can be placed on the model at one time, and the angle of the slope can be adjusted to accommodate variations in the friction of different skis.

Build Notes
Note that the assembly of this model is quite advanced. Most of the frame uses basic studs up building techniques, but the drive system is reasonably complex for a System model, and there are a few non-standard build techniques used along the way.
As always, when building Technic drive systems, it really helps to ensure everything spins freely as they are being assembled. It’s pretty easy to press Technic bushings and gears on too tightly, which will introduce excessive friction into the system.
Slope Adjustment and Ski Performance
The rotating knob on the back of the model can be used to raise or lower the entire back of the ski hill, adjusting the angle of the ski slope.
In my testing, I’ve found that the friction of the skis can vary a bit, so you might have to adjust the slope angle to suit the skis you are using. If the slope is too shallow, the minifigs will not make it to the bottom. If the slope is too steep, they can go too fast, and fall over as they are skiing or when they hit the bottom.

Minifig Performance
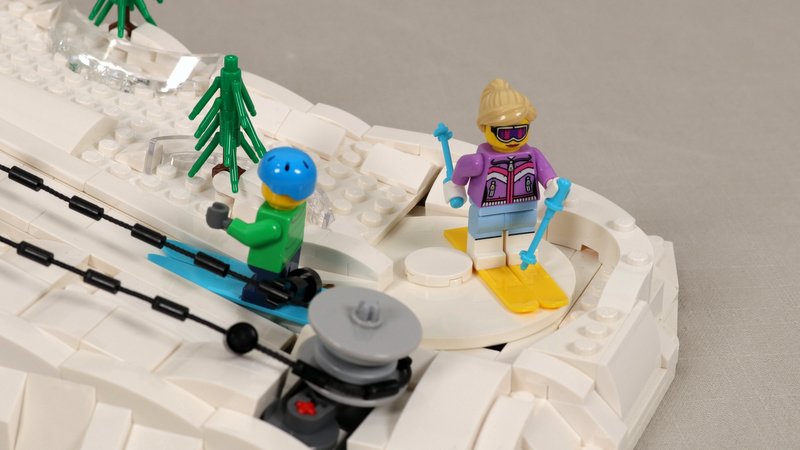
The minifigs you use can also affects their performance. The size and weight of a minifig will affect how fast it skis. Minifigs with short legs are more stable than minifigs with regular legs. Minifigs with large head gear (hoods, big hats, etc.) are top heavy, and can be prone to falling over.
It is possible to use minifigs with ski poles, but the poles need to be positioned so that they don’t interfere with the minifig getting on or getting off of the ski lift. You can see how I’ve oriented them in the photo below.
It is also best if minifigs, especially those with short legs, have their left arm raised up a bit, so their hand doesn’t get caught in the lift cable.
Multiple Skiers
In general, you will get the most reliable performance by having a single minifig skiing at one time. The slope angle can be adjusted specifically to that minifig, and if the minifig misses one of the lift bars, they can comfortably wait for the next one without other minifigs getting caught up behind them.
That being said, it is very fun to have multiple minifigs skiing at once. There are 3 bars on the lift cable, which allow three minifigs to be skiing at once.
It works best when the minifigs all have similar performance, so they can all reliably ski down the same slope angle at similar speeds. You might have to try many different ski and minifig combinations to find multiple sets that work well together.
Power
The drive system only works in one direction, bringing the minifigs up the slope. Nothing bad will happen if you run the model in reverse, it just won’t drive the lift cable. You can power the model manually, or by connecting a Powered UP, Power Functions or Circuit Cubes Cubit motor. If you are using a Circuit Cubes motor, you can change the direction by rotating the wire 180 degrees when connecting it to the motor.
The instructions show how the model can be configured for manual operation or motorized using a Circuit Cubes motor. Any Powered UP or Power Functions motors can be easily connected directly to the exposed drive axle using two Technic pins, as shown in the demonstration video.

The parts list includes the pieces needed to connect Powered UP, Power Functions or Circuit Cubes motors. It does not include the motors or battery boxes themselves. Depending on which system you decide to use, you will also need the following.
Circuit Cubes
1 x Circuit Cubes Cubit Motor
1 x Circuit Cubes Bluetooth Battery Cube (the regular battery cube will also work).
1 x Circuit Cubes Twin Cable (any length will do)
Power Functions or Powered UP
1 x Motor (any will work)
1 x Battery Box (any will work)

![[Valid RSS]](https://bricksrss.com/wp-content/uploads/2023/05/valid-rss-rogers.png "Validate my RSS feed")